 By TIM ASHLEY
Where to start? The price (great value from one angle, hugely expensive from another) or the form factor (a heaven-sent purity of purpose or an irritatingly restricted use of a full-frame sensor) or the ergonomics (so nearly right, so clearly wrong)… Nope. I’ll start with the files. These are very nearly the best files I have ever seen from any camera, including the D800E and the Phase One IQ180.f
You can do almost anything with them in post-processing. You can enlarge them to the size of a (small) bus, you can underexpose them brutally and still get great results. You can pull up the shadows, bump up the sliders every which way, and the files will just sit there and take it.
The weasel word here, of course, is “best.” They don’t have the resolution of the D800E or the IQ180 but they have better high ISO than either, enough to beat off nearly all competitors. They don’t have quite the DR of the D800 but it’s really close and they beat the IQ180. And the color depth is up there with the very best.

I have had the camera for four days now, one of which was spent travelling, and I have shot less than 250 frames but I feel confident in saying that for prints up to, say 30″ on the long end (and possibly larger), I would rather start with RX1 files than with almost anything else.
Add to this that the lens is a well-behaved gem, sharp to the edges and with well controlled distortion and aberrations, very very well matched to the sensor, and we have what looks to be an all-time winning package.
Note: I suspect the lens is best at close to mid distances and may, like the Zeiss 25mm ZF.2, be slightly less amazing with very distant subjects. I will test this in more detail.
But, and here’s the biggest of buts: for handheld use, I would rather shoot with almost any other grown-up camera. The RX1 handles like a point-and-shoot: it takes too long to get out of bed and it makes point-and-shoot-like startup sounds while so doing; its AF is too slow and not sufficiently reliable, for me.
Add to that the dreadful ergonomics of using such a perfect sensor and lens at arm’s length whilst squinting at an LCD through sunglasses with the glare bouncing off the screen protector I applied, and add to that the fact that decent usability will require the thumb grip, the (astonishingly) not included and vastly, vastly overpriced lens hood, and the jury retires with a scowl.
Sorry.
And there’s no point shouting at our the jurors as they leave, “but put it on a tripod and use it like a field camera, you’ll see it’s a good boy really,” because though this is true, and though, for example, the zoomed view manual focus works in a manner so satisfying as to make the average D800 owner curse, the bottom line is that this camera is truly great at what it largely won’t be used for, and not very well thought out for what it largely will be used for.

I freely admit that all this may change when the EVF arrives (but they are like hen’s teeth) and when my £6-including-postage knock-off lens hood arrives. But then again, that’s a screw-in and may start to cause vignetting when used with filters. So for now, I am reaching more for the RX100 with which I am also travelling because it actually is a point-and-shot and it knows it, and offers compensations in the form of a pretty decent zoom lens, genuine pocketability and insanely good IQ for its size.
The RX100 is good, IMHO, for exhibition quality prints up to around 20″ if shot correctly and at lower ISO and mid apertures. When those conditions can be met, it’s the more useful of the two camera for “serious casual” use. Indeed, I have heard that leading stock agencies will accept its files.
Gloomy intro, eh? Well, don’t despair — because reactions to ergonomics are very personal whereas the qualities of the files and the lens are more objectively demonstrable. So let’s look at some emerging detail. I say “emerging” because getting the real measure of a camera takes many many hundreds of frames, in all sorts of light, at all sorts of distances, with all sorts of triumphs and failures. You can’t put a metric on wide experience so please take all that follows with that in mind.
This piece will be the start of a rolling review: I will add updates as and when they become pertinent and as and when I am able to answer the slew of questions that will doubtless arise from readers. It is mainly aimed at advanced users and will therefore assume certain knowledge on the part of readers. It will also be aimed at RAW shooters so please don’t expect any coverage of scene modes and effects or of video.
Initial Processing Tips
Frankly, the JPEGs are so good that a lot of people could happily shoot them and even happily post-process them to a degree. But as we all know, there’s nothing as good as a RAW file for flexibility and quality of ultimate output. Trouble is, Sony’s Image Data Converter doesn’t impress me at all.
Most irritating is that even with sharpening set to 0, quite a lot of not very good sharpening is being applied. As of this writing, Lightroom doesn’t yet read RX1 RAW files (.arw) and that leaves Capture One (7.0.1) which does read the files but, on my Macbook Retina, is buggier than the Everglades. But with coaxing it works. So my proposed processing is as follows (if you have the software):
- Import into Capture One. Turn off all sharpening and reduce NR to Off except Color Noise: set it to 1 or 2, otherwise files export with weird stripes (bug).
- Export as 16 Bit full sized TIFF in ProPhoto Color Space.
- Import into Lightroom and apply sharpening at 60/0.7/70/20, then apply NR to taste (probably none at lower ISO).
I have tried many recipes and combinations and for now, that suits me best and gives the most natural but effective sharpening.
A Flawed Cross Camera Comparison
Before we crack into the specifics of the way the sensor behaves and the qualities of the lens, I am going to reproduce a long post I have made elsewhere because so many people have found it useful. Following this link will take you to a gallery of images comparing the same scene shot on the RX1 and then a variety of other cameras.
Shot on the same tripod, unmoving between shots (though tripod plate placement and mild differences in FOV make the framing slightly different between shots), these were all taken at ISO 200 (the lowest ISO common to all cameras tested) and F5.6 — and for each camera tested, one was taken as per in-camera metering at 0EV and one at -2EV.
The frames were then processed as suggested above. I also manually white-balanced them to give similar results. The -2EV shots were then given +2 stops exposure compensation in LR, aside from the RX100 which was only given +1 because its maximum shutter speed did not allow the initial -2EV frame to be correctly captured so instead it was effectively at -1EV.
In other words, all the underexposed versions were normalized so as to see how each camera’s files fared by being underexposed and then compensated in post.
The files were then exported to 92% quality JPEG, full size, ProPhoto color space.
The files are in this order:
RX1 @ 0EV then -2EV
5DII @ 0EV then -2EV (shot with Canon 35 F1.4L)
D800E @ 0EV then -2EV (shot with 24-120VRII at 35mm, see note below)
RX100 @ 0EV then -2EV (actually only -1EV due to shutter speed limitations)
Fuji X100@ 0EV then -2EV
Notes: The Nikon shot is the just about the best BUT it is also very soft on the right hand side: my own copy of this lens has had multiple repairs and has this problem so I have a loaner from NPS which has just arrived and is showing the same problem, which indicates a problem with my D800E but there is no evidence of this with other lenses. A currently unsolved mystery. I don’ t shoot 35mm as a focal length very often, so I don’t have a prime for the D800 to match the primes on the other cameras. But it’s still a useful comparison, to me, because I value a wide to short tele zoom when travelling and the RX100 has one… also because the test is about more than lens and file resolution: it’s also about DR, noise and color.
The exposure differs slightly across frames and cameras: cameras meter slightly differently, their lenses have different T stops even if shot at the same f-stop, and their actual ISOs are not the same as their nominal ISOs. Light and shade fluctuated during the test, too. I have made no attempt to normalize exposures other than boosting those shots made with negative exposure compensation by the amount they were underexposed.
Comparing the files is non-trivial since there is no level playing field. They could all be up-resed to the resolution of the D800, down-resed to the Fujifilm or mid-resed to the RX1 — and a case could be made for any of these. In any event I suggest comparing center and left of frame at a 50% zoom view on screen.
The full sized JPEGS are all downloadable: click on a thumbnail, when the larger image loads, mouseover it and the menu at top left of the image will give an option to download the original whereas the “i” button top right of the image gives EXIF.
My own take on these results is that as a system (lens + sensor) the RX1 beats all of the cameras in the test. It smokes the Fujifilm, it is slightly better than the Canon 5D Mark II system (and with more extreme post-processing the superior flexibility of the RX1 files becomes far more evident) and it is also clearly superior to the RX100.
That it beats the D800E is also no surprise: that camera was operating with an as yet undiagnosed mismatch of lens and camera but even had those two components been singing from the same hymn sheet, I suspect the RX1 would still have looked better in a 30″ print because the Nikon needs great primes to get sharp edges and trust me, there are a lot of great primes that struggle to achieve that.
This brings me to my final point in this section:
The RX1 has no mirror and the lens can therefore have its rear element much closer to the sensor than can any SLR lens.
The downside of this is that rays hitting the edges of the sensor do so at a more acute angle than in an SLR. Sensor design must take this into account if odd color shifts and strong vignetting are to be avoided. Wide lenses for SLRs like the D800 are generally retrofocal in design so as to deal with the need to offer space for mirror clearance.
Retrofocal designs require optical compromises that can affect aberrations, distortions and edge sharpness, as well as introducing field weaknesses and curvatures. So in theory, a mild wide for a full-frame sensor can be designed with fewer compromises and therefore better performance and smaller size if there is no mirror to deal with.
That’s why, for prints up to 30″, the D800 is going to have a hard job beating the RX1 at this focal length: I suspect, on reflection, that the Zeiss on the RX1 will prove to have better edge performance, when someone has run the numbers, than either of the current Zeiss SLR primes or the Nikon 35mm F1.4 can achieve on a D800. This is not what I initially thought but after a couple hundred frames, I’d wager a tenner on it.
More About The Files in Post
Boy can you push them. Here are some examples, with “out of the can” and “heavily processed” versions:


Notes: This is also a great example of poor AF: I’m pretty sure I pointed the AF square right at her… but the square is just too big and about 5% of the time it “sees” the background instead and misfocusses. So if you zoom the original of this, she is blurry as heck. Also please excuse color renditions. I am on an uncalibrated monitor and was shooting with a slightly purple-inducing polarizer, then processing the hell out of the files. Eventually I will make a color checker profile for the RX1 and shoot with a WhiBal card. For now, I’m not finessing.


… and finally, with a 100% crop so you can see how little noise is introduced by really aggressive processing:



All the above files were shot with a polarizing filter fitted.
A last word for today: As I hung around the beach with the RX1, I reached repeatedly for the RX100 when it seemed to offer a better FOV or a more distant and therefore anonymous vantage point. My favourite shot of the day (though hardly a prize winner!) was made possible with the RX100 in a way that would have been more difficult with the RX1:

I didn’t consciously try to do side by side comparison shots, equalizing all parameters: there’s no point, the results are known from common sense and demonstrated in the test scenes linked to further up this thread. But I did take some similar frames including the two that follow so I have provided links to 50% sized versions of them.
I found, on reviewing the day’s captures in LR on my Retina screen, that I often, even when fully zoomed, had to check to see which frame was from which camera. Despite the fact that conditions were ideal for low ISO, high shutter speed, optimal aperture shooting, that tells me something.
Click the images to load 50% of full sized versions in a new window and be aware that the RX100 file had selective saturation adjustments to emulate the look of the polarizing filter I used on the RX1…


Two More Tips, ISO Series, Bokeh Series and Color Fringing Examples
- When working from RAW files and developing via Capture One, to roughly match the distortion correction of the in-camera JPEG processing, apply either a 26% slider correction in Capture One or a +14 in LR.
- When using the camera without EVF and at arms’ length, aperture priority users like me might find the “change the aperture by twisting the aperture ring on the lens” method, traditional though it is, annoying. It’s probably going to be great for “Leica style” shooting with the EVF. But using the LCD, it’s clumsy. Instead, set the camera to P mode and then you can effectively adjust the aperture by turning the control dial with your thumb. This feels a lot more natural.
Today I shot a series of frames at every major ISO. The scene is as follows, and clicking the image takes you to a gallery with all the images, downloadable at 50% resolution for comparison:
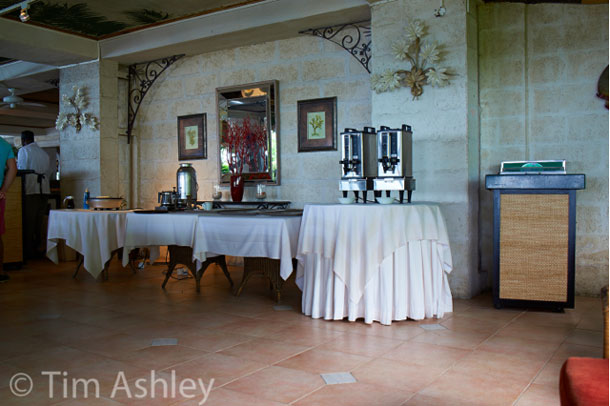
My comments:
This is about as good as it gets in modern sensor design. Eminently useable for large prints up to 3,200 (1,600 if you are very fussy) and still useable for Web images and smaller prints in the higher ISO range. Be aware that this scene was shot in indirect natural light and that high ISO work in tungsten or fluorescent light will be less impressive, whatever the camera you use, because the temperature of the light does not “feed” all the sensor’s color channels evenly.
Processing for these shots was from RAW, and I used Capture One defaults for both sharpening and NR. I did this because the folks at Capture One have created tailor-made mixes of these parameters for each ISO, and they are pretty good at it. It will be interesting to see how Lightroom does here when it supports the files.
Here is a series shot at every major aperture with both foreground and background subject so the bokeh can be assessed. Bokeh is very personal so I will just say that I think it very nice indeed. Also note that the lens reaches its best resolution on centre at about F5.6, and then pretty much holds that through F11 at 50% zoom view. Diffraction becomes evident at F16, which is roughly equal on center to F2, both very good. F22 is for DOF emergencies only but is still acceptable. Click on the image to go to a gallery with all the shots at 50% resolution.
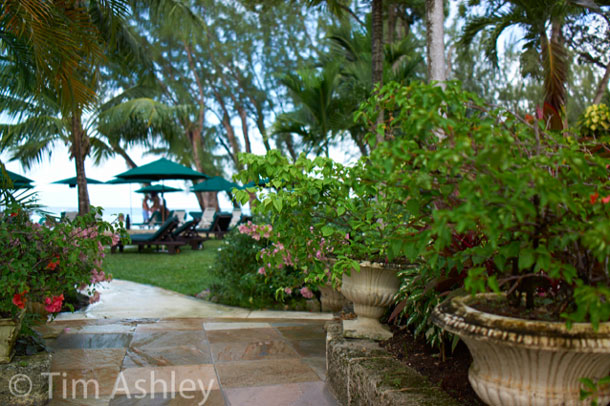
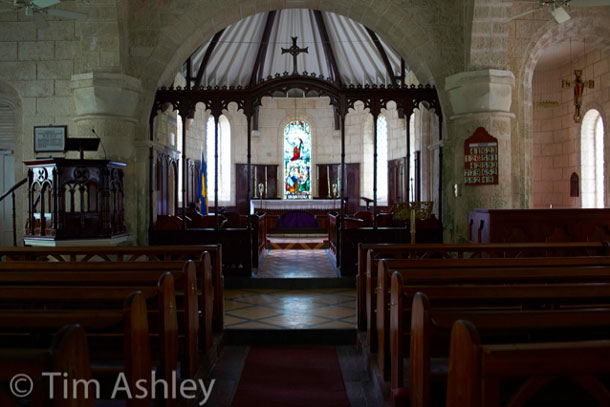
Color fringing: I provoked a case of color fringing by shooting extreme contrast at F2 in the following scene:
Look at the window second from left: It has some fairly mild but clearly evident purple fringing as seen in this 50% crop from an untreated RAW file:
The in-camera JPEG processing does remove this quite well but it also changes the balance of the purple of the flag, as in the first crop on the left.
The in-camera JPEG processing does remove this quite well but it also changes the balance of the purple of the flag, as in the crop in the middle.
Crop on the right: Lightroom’s Defringe Tool does a better job of getting rid of the purple fringe around the window, but does a little more to hurt the flag.
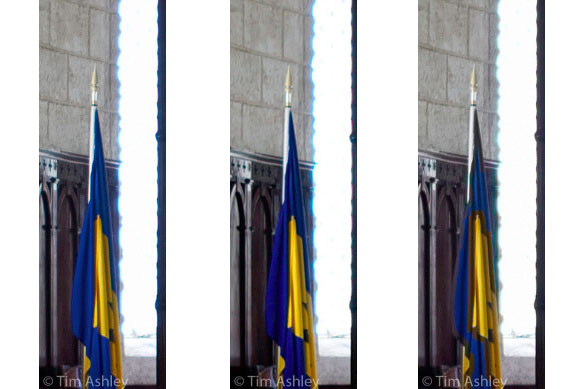
In any event, this sort of fringing is rare. It’s largely gone by F5.6 or often by F4, and generally takes quite extreme conditions to provoke. Also, in Lightroom, you can add a local adjustment to “paint away” the defringe effect on areas like the flag where it’s not needed.
Focus Shift
Focus shift, the phenomenon whereby the point of actual focus shifts backwards as a lens is stopped down, can really badly affect the performance of even the best optics. The classic example was the last generation Leica 35mm F1.4 Summilux, which, when put on a digital camera, had such notable focus shift as to make it IMHO unsuitable for critical use. But there are many current designs that suffer this too and it always important to test for and be aware of the performance of all your lenses in this regard.
It must be said that the effect is most serious on those cameras that focus “wide open” and then stop the lens down to take the shot. That’s why it’s not a problem, even with badly affected lenses, when using live view. So the cases where it might be an issue on the RX1’s Zeiss lens are rare: really only if you were to manually focus wide open (or AF and lock), and then change your mind about the aperture and not re-focus.
However, I tested the lens today and it has exemplary behavior in this respect as the files below show. The camera was placed on a tripod and at F2, manually focussed in maximum zoom view on the center of the second circle back. The lens was then progressively stopped down through F4, F5.6 and F8 and exposures made, with no change to focus.
The resulting files show that the DOF increases as you would expect, but that the plane of focus doesn’t noticeably move and the original point of focus remains perfectly crisp throughout.
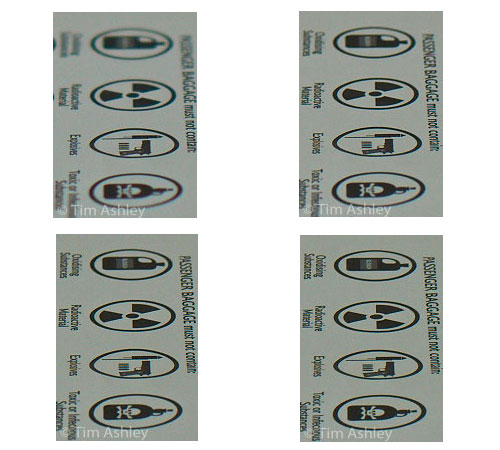
Flare
Flare, finally: I have tried pretty hard to make it happen in very very bright conditions. I have shot straight into the sun with the sun both in and slightly out of frame and I have managed only once to get any sign of flare at all, in the very boring shot below. The lens hood would almost certainly have stopped both this ghosting and this veiling flare. But the Zeiss T* coatings are, in my experience, fantastically good and it seems they have been used to full effect with this lens so in general the hood will mostly be there as added protection for the front element.

Lightroom 4 Now Processes RX1 RAW Files — Comparisons with Capture One
Fabulous news! I don’t like Capture One. It might have the smartest de-bayering in the world (some think so), but it is buggy, has a poor user interface and workflow and shabby housekeeping habits. But until today it was the only game in town for decoding RX1 RAW files, other than Sony’s own Image Data Converter, about which I will remain polite but from which I have had little pleasure.
Now, Lightroom’s final release of version 4.3 supports the RX1 files. And it does a good job. And, very usefully indeed, it has a lens profile for the RX1 so it can perform distortion correction. This is great.
I have been playing for a couple hours and have made some example files to show what I have discovered. Firstly, sharpening: this scene will be familiar to followers of this review:
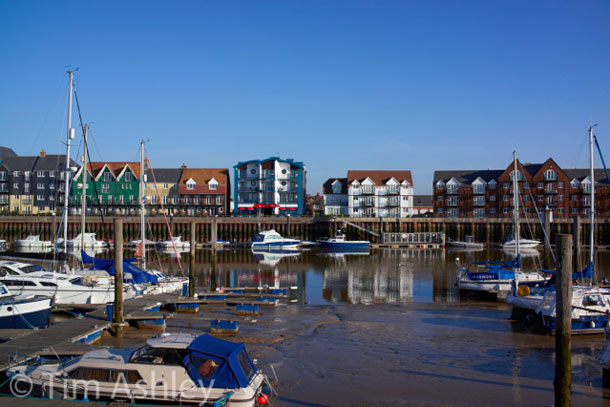
I have now converted it in Lightroom with default sharpening, in Lightroom with my home-brew sharpening of 60/0.7/70/20 and in Capture One with default sharpening. In that order, crops from the centre are below. They clearly show when viewed at 50% zoom that Lightroom with my home-brew gives the best results and is better than the other options. In fact, at lower ISO, you can squeeze a drop more by boosting the first of the above values to 80 or even 90 depending on taste…
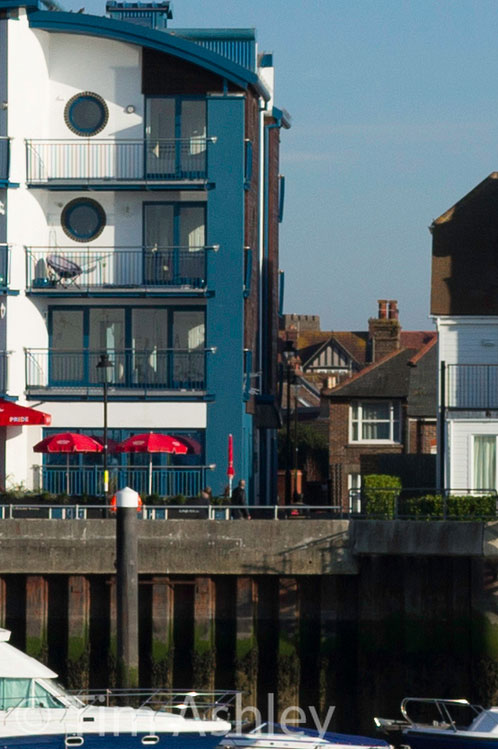
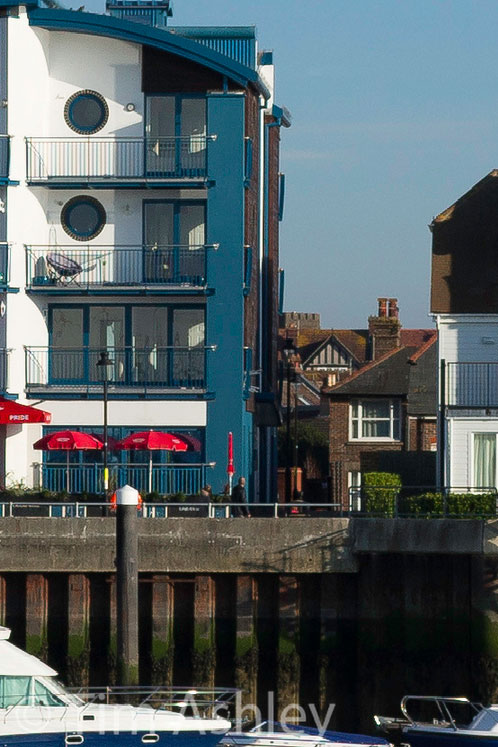
However, at higher ISO, that sharpening is a little too much. One thing that Capture One does very well is provide differing defaults for NR and sharpening depending on the ISO of the file. In Lightroom, the same defaults are applied to files of every ISO. This doesn’t necessarily mean that high ISO processing is best done in Capture One (though some people do believe that) but it does mean that unless you are very confident at processing, it is most easily done there.
I have processed the earlier ISO series again, but today using Lightroom at default for NR and with my home-brew for sharpening and the results are available here. They clearly show that up to ISO 1,600, my method in Lightroom gives better results.
At 3,200 though the two differing methods are neck and neck and thereafter, Capture One does a much better job. This is partly because my Lightroom sharpening is better suited to low ISO images but partly because Capture One does all the work for you at higher ISO.
Otherwise I have few comments other than to say that Lightroom is the best, easiest and quickest way to get great results from low to mid ISO RX1 RAW files, especially when it comes to getting rid of purple fringes and lens distortion. It is a great relief that RX1 files are now supported and that so many new owners will now be able easily to access the full, stunning depth of its output.
Coming up:
In the next few days I will post further images, examples and tips. When I return home mid-next week I will shoot and post my usual aperture series showing lens performance at every aperture with full sized files for you to download. This requires a particular sort of target hard to find where I currently am and, to be thorough, I will use near, mid and far scenes at all apertures. I will also add a section on the EVF when I get it. So better stay tuned!
+++ For more on the Sony Cyber-shot RX1, read our dedicated, constantly updated The Sony RX1 Review File. You can order the Sony RX1 from Amazon, B&H or Adorama.


