
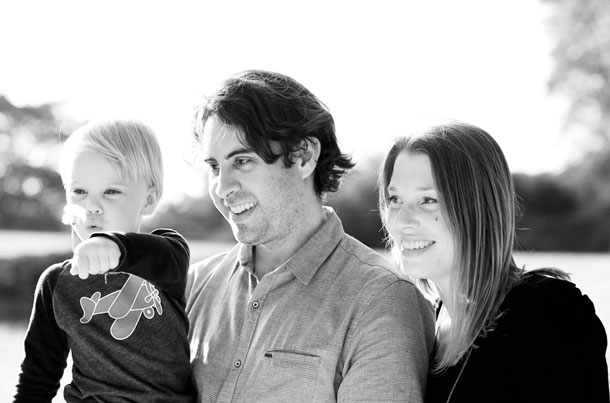
You’ve seen those black-and-white photos in portfolios of top family and wedding photographers. They have a distinct richness, depth and impact. The shadows are deep and yet don’t look like they’re clipped. The contrast is powerfully high and yet doesn’t make the photo look harsh. There’s a smoothness and softness to the photo; and yet there’s a punch.
It often looks like an old film photo out of a glossy magazine.
Here’s a way I found of creating that look.
1. Open Image in Photoshop (or Import Into Lightroom, Aperture, etc.)
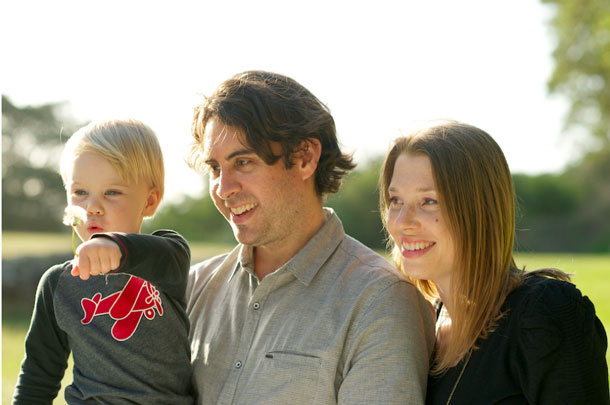
It helps to start with a properly exposed, well-lit photo which has a good histogram.
In this photo I might have clipped the highlights a little around the subjects’ hair, but because I’m using the sun mainly as a backlight, I’m not worried too much about it.
In an ideal world the man would have perhaps received some bounce too, but the reflector wasn’t big enough to cover the group.
And in a way, I like that only the woman’s face received fill light; I think it creates a nice moody contrast between her and the man; her light, pure femininity is noticeable against man’s more scruffy, darker masculinity.
2. Add a Touch of Contrast
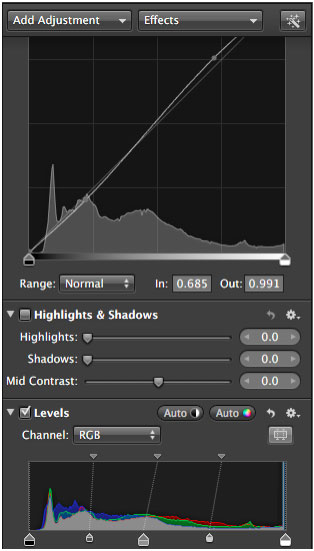
Go to the Curves control and add the classic “S” by dragging the shadows down a little and lifting the highlights up.
Next, go to your Levels adjustment and drag the midtone control a touch towards the shadows end.
Feel free to play around with these until you find a contrast which works for you.
If at this point you’re still editing your image in a non-destructive editor like Lightroom or Aperture, this is the point at which you need to export your file into Photoshop.

3. Convert to Black and White
In Photoshop, Layers >> New Adjustment Layer >> Black-and-White.
You’ll be presented with a dialog box which allows you to control exposure for individual colour channels or choose a preset.
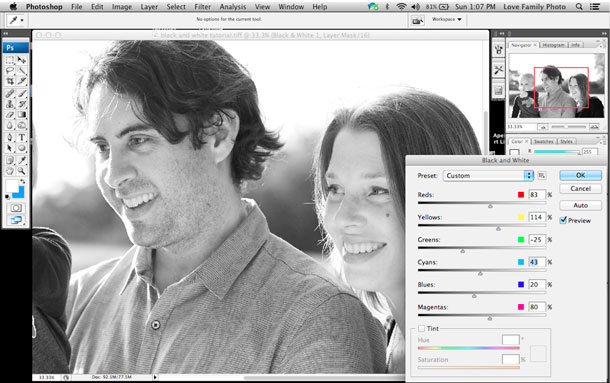
I suggest you start by scrolling through different presents to see which one you like the most and then use the sliders to fine-tune the look.
Here, I started with the Yellow Filter preset and then added even more exposure to yellow and red channels to really bring out the faces of my subjects. I then took down the other sliders to add more contrast against the background.
Flatten your image before moving on to the next step.
5. Duplicate and Blend Layers
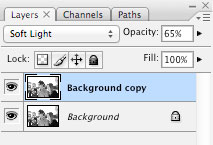
Go to Layer >> Duplicate Layer >> OK.
In your Layers palette, change your Blending Method to Soft Light. Adjust Opacity of the layers to one where contrast is a nice mix between punch and soft. In this instance, I liked it at 65%.
6. Add a Touch of Sepia
I personally like to warm the photo up a little from the stark pure blacks and whites.
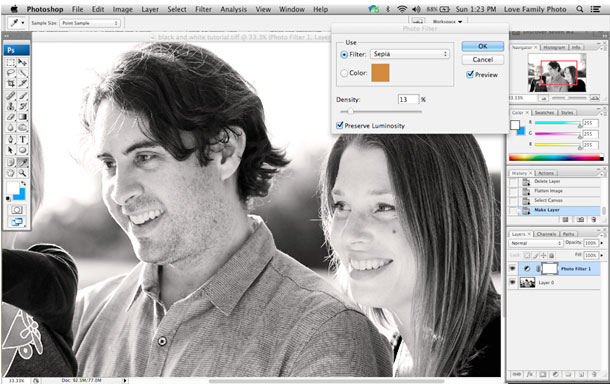
Go to Layer >> New Adjustment Layer >> Photo Filter >> Sepia
And when I say a “Touch Of Sepia” I really do mean it – a person looking at the photo should not notice that there’s a colour in the photo. Keep the opacity below 15%.
7. Add a Touch of Grain
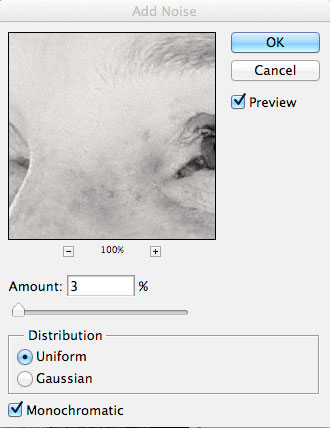
The finishing touch for that film look. But be careful to not overdo it.
Also, be mindful that if you shot the photo at high ISO and you already have some noise in the photo then you might not even need this step.
And there you have it. No need to buy complex plugins or film-look simulation programs.
To take this further, feel free to play around with different blending modes.
You can also duplicate the layer a number of times and choose a number of different blending modes at different transparency levels.

